Version 14.19
Overview
The sections below provide information on the different options available for posting charges and for saving the charges after you've reviewed them in the Add/Edit charges window.
Posting Options and Where They're Available
Posting Option | Definition | Tracking | Chart | Billing Center |
| Auto-Post | A system preference that can be disabled if desired; allows users to post all charges in one click. The Add/Edit Charges window does not open for you to review or edit charges, but edits may still be made to the posted charges by clicking the Edit button for the posted charges. The Edit button reopens the Add/Edit Charges window where edits can be made and saved. | X | - | - |
| Post All * See Note below | Allows users to post all charges for the patient that are listed as unposted charges. The Add/Edit Charges window opens so users can edit charge information. | X | X | X |
| Post Selected | Allows users to split the charges to create multiple claims. To select the charges:
| X | X | X |
| Edit | Allows users to view and make edits to the electronic superbill information prior to posting the charges. | X | X | X |
Note: If Post All is selected when charges for more than one visit for the same date of service are listed (i.e. the same child returned and saw another provider on the same date), a Warning confirmation box is displayed to alert the biller that Post Selected should be used. |
Posting Options to Save Charges
Once charges have been reviewed in the Add/Edit Charges window, you will be presented with three options regarding how you would like to save the charges and exit the window. Once one of the above buttons is clicked, the charges will be displayed as Posted Charges. For information on how to edit current posted charges (those which have not been archived on a daysheet), click here.
Button / Function | Definition |
| Save + Queue | Saves the claim and places it in the Transmit Queue. |
| Save | saves the claim, but does not place the claim in the Transmit Queue. Click here to learn how to then move the claims to the Transmit Queue. |
| Cancel | Saves the claim, but does not place the claim in the Transmit Queue. |
Version 14.10
Overview
The sections below define the posting options available prior to reviewing the charges and the options available for saving and queuing the charges.
Posting Options Available Prior to Reviewing Charges
The following options appear in the tracking window where charges may be posted. Post All and Post Selected exist in the Billing Center and Patient Account. Knowing the differences between the buttons will allow you to develop a workflow that works best for the practice.
- The Auto-Post button, a system preference that can be disabled if desired, allows users to post all charges in one click. The Add/Edit Charges window does not open for you to review or edit charges, but edits may still be made to the posted charges by clicking the Edit button located in the Posted Charges section of the window. The Edit button will reopen the Add/Edit Charges window where edits can be made and saved.
- The Post All button allows users to post all charges for the patient that are listed in the unposted charges section of the window. The Add/Edit Charges window will open so users can edit charge information.
 | If Post All is selected when charges for more than one visit for the same date of service are listed (i.e. the same child returned and saw another provider on the same date), a warning box appears to alert the biller that Post Selected should be used.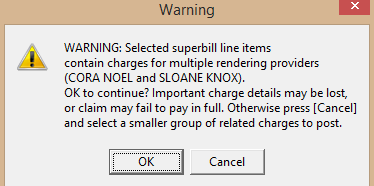 By clicking OK, all charges will be pulled onto the same claim. However, only one provider will appear on the claim (the first to have seen the patient). By clicking Cancel, you will have the opportunity to select which charges should be billed together and then select Post Selected. The corresponding Billing Provider will appropriately attach to each claim. The same functionality applies when posting charges from a patient's account. By clicking OK, all charges will be pulled onto the same claim. However, only one provider will appear on the claim (the first to have seen the patient). By clicking Cancel, you will have the opportunity to select which charges should be billed together and then select Post Selected. The corresponding Billing Provider will appropriately attach to each claim. The same functionality applies when posting charges from a patient's account. |
- The Post Selected button allows users to split the charges to create multiple claims. To select the charges:
- Hold down the Ctrl key on your keyboard.
- Click on the claim lines to highlight the charge lines that you want to post.
- Click the Post Selected button. When posting selected charges, the system will then prompt the question "Split the highlighted charges to a separate claim?".
- The Edit button in the unposted charges section of the window allows users to view and make edits to the electronic superbill information prior to posting the charges.
Posting Options to Save Charges
Once charges have been reviewed in the Add/Edit Charges window, you will be presented with three options regarding how you would like to save the charges and exit the window.
- Save + Queue: saves the claim and places it in the Transmit Queue.
- Save: saves the claim, but does not place the claim in the Transmit Queue. Click here to learn how to then move the claims to the Transmit Queue.
- Cancel: saves the claim, but does not place the claim in the Transmit Queue.
Once one of the above buttons is clicked, the charges will be listed under the Posted Charges heading. For information on how to edit current posted charges (those which have not been archived on a daysheet), click here.