- Navigate to the Schedule Template Editor (Utilities > Manage Practice > Schedule Templates).
- Select the Staff member whose Schedule Template you would like to print.
- Select the Template you would like to print.
- Click the Print button
 . The Schedule Report Options window will open.
 . The Schedule Report Options window will open.
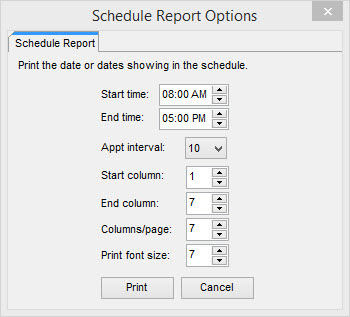
- Complete the following:
- Start and End times: the time range that you want to include on the Schedule Template printout.
- Appt interval: the intervals in which you want to print. If your template is set to 10 minute intervals, set this field to also be 10 minute intervals.
- Start and End columns: the columns are numbered by the day of the week. For example, if you choose 1 in the Start column field, Sunday will be the first column on the schedule template printout. The End column is the last column that will be included on the Schedule Template printout.
- Columns/page: this is the number of columns (days) that appear on a page when the Schedule Template is printed out.
Note: To print a full week on one page, enter the following:
|
- Click Print.